Bookcase-Cam - Days Thirty Two - Thirty Five
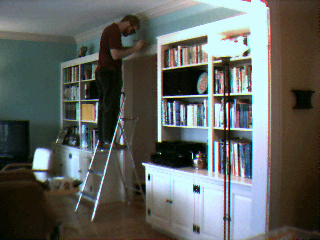
And now, the home stretch. First you should notice the black speakers in the upper cabinets. My dad came out for another visit (I bet he never thought he'd still be working on this project on his next trip out, but then on the other hand, he knows me pretty well...) and we spent a few hours wiring behind the cabinets for stereo. Cutting a two-inch hole into the pristine cabinet top required some steely nerves, as did puncturing the cabinet backs for speaker wire. But fishing the wires was easier than I expected it to be, everything's nicely concealed, and we finished the holes with reasonable-looking plastic grommets. The result is eminently satisfactory -- planning pays off yet again.
Also you can't see it here, but my beard is back.
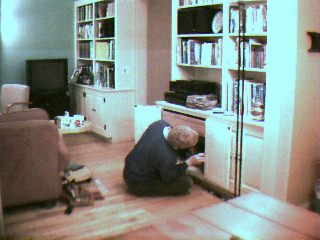
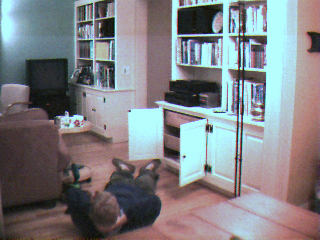
I'm installing a drawer sized for compact discs. The main problem with the drawers is that the face frames overhang the cabinet walls; the drawer sides are therefore a few inches in from the walls of the cabinets. To make matters worse, the cabinet doors are surface-hinged, so their edges when ajar intrude on the opening even more. How to support the drawers so far from the cabinet walls? I build L-shaped brackets consisting of several plywood strips glued together and screwed to the walls. They are asymmetrical, and must be trimmed to exactly fit the drawer width or the drawers will bind on their glides. They must also be trimmed such that the drawers will be centered. It takes a bit of time to fit two CD drawers in the south cabinet and one videocasette drawer on the north (already installed).
The brackets support the drawers well, but are visually clumsy. With one drawer in and the other temporarily balanced in place, I pause to wonder if there is an easier way:
There is: build cabinet walls flush with the edge of the face frames. Yet another reason to build the carcase in the shop, with walls & backs, and scribe to the room walls at the end. Too late now...
An inspiration I'm particularly happy with, though, is a set of 3/4" aluminum strips, each set on edge between two rows of CDs, keeping the CD cases from catching on their neighbors as I flip through them. Easy, effective, unobtrusive, and the aluminum is unexpectedly handsome against the clear-coated birch grain.
One last aesthetic fix: The speaker cable runs between cases atop the doorway molding, and is visible to someone standing at the other side of the room. Chisel in hand, I cut a groove in to the molding on top of the doorway, and the cable lies nicely within it.
I see you have taken note of those fetching safety goggles I'm wearing. I bought them at Christmastime -- the wraparound lens yields great visibility and the foam edging keeps stray dust out of my eyes. As nice as they are, the temples pressed my oversize cranium uncomfortably, so I heated them over the stove and bent them out a bit.

The final operation is to install shelves in the two drawer-less cabinets. Fortunately I had leftover lengths of shelf standard from the upper cases. I also had exactly enough leftover plywood; of the six sheets of 3/4" material we bought a year ago, there's not a piece remaining large enough to make a single shelf! The remaining scrap is well under that required to constitute a single 4'x8' sheet, which means I bought exactly what I needed (quite satisfying, at over $40 per sheet).
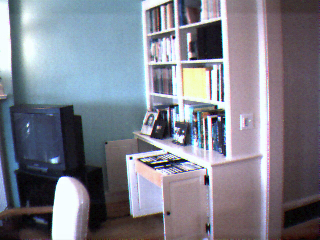
The same day I cut the groove for the speaker wire I also cut, edged, trimmed, and painted the drawers and installed the standards. I had decided that if it took all night, I could not let the project go past its one-year anniversary. I had to rush the paint job a bit and the shelf bottoms show it -- should you care to poke your head in there -- but I finished on time. Here you can see the shelf and completed CD drawers in the south cabinet, with a subtle indication of project's start/end date...
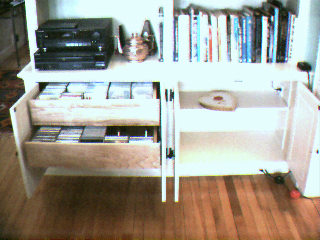
...and the videotape drawer (alas, the shelf is obscured) in the north cabinet.
This drawer is a problem. I store back issues of Fine Homebuilding under it, and with minimal clearance between their slipcases and the drawer above, the tapes come within 1/8" of the face frame. Perfect space planning, right? Excruciatingly sublime volumetric efficiency, yes? Well, almost -- unfortunately, the door-closing magnet hangs down below the face frame by 1/2", which means it blocks the tapes in the middle of the drawer! Perhaps I can find alternate, zero-clearance door-closing hardware someday. For now, I'll lay the middle tapes on their sides and call it wabi, the Japanese term for avoiding arrogance by leaving an imperfection in an otherwise flawless piece. (This project has lots of wabi).
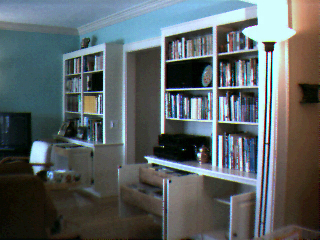
So here it is -- the completed project in full-featured glory:
Though a long road, I'd be happy to take it again. In fact, as I re-read this journal, I am seized with the fantasy of redoing the entire project, just to see how much quicker and better it could be executed. But, as I say, it's just a fantasy...
THE END
(?)
Initial week of daily activity: |
Day 1 |
2 |
3 |
4 |
5 |
6 |
7,8 |
9 |
Long-term weekend progress: |
10 |
11 |
12,13 |
14,15 |
16-18 |
19 |
Intermittent bursts of effort: |
20-22 |
23-31 |
32-35 |
Bookcase-Cam Home
Comments? e-mail me.