Bookcase-Cam - Days Twelve & Thirteen
Two weeks later, I resume. The trip to the lumberyard for face frame stock is unavoidably delayed as record-high late March temperatures require that we test drive the new 1999 Mazda Miata:

Many aspects of this fabled steed have been improved in the '99 redesign, yet the ride is still inexplicably harsh. No sale today.
Back at the work site, I now have a 15-foot extension cable for the camera, which allows a much better view of the operation. I can also show you the tableau of high-tech equipment that brings you this public service:
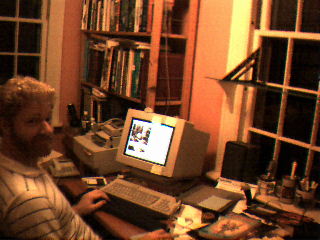
And you can get an idea of why we need these bookcases.
Though the camera has a much improved view, it can no longer see the little ledge in the study window upon which I liked to set the clock and other items of interest for those unexpectedly frequent and lengthy intervals when there is nothing else happening on camera. Perhaps I can find something to act as a pedestal, or maybe perch things on the sofa back.
Saturday I cut and assemble most of the north face frames; here I hold that assembly for the north lower cabinet.
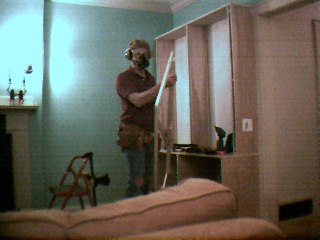
I'm wearing the hearing protection, safety glasses, and dust mask that I always don when using power tools other than the electric drill (OK I admit it, sometimes I don't wear the glasses when using the belt sander either). Usually I remove them right away but occasionally I forget and wear them upstairs. They're geeky, but it beats hearing loss, eyes full of sawdust, and coughing fits all day. And as the saying goes, in a workshop either you wear a filter or you are one.
Sunday afternoon, the cabinet face frame is back in the basement shop for some routing to provide a smidgen of extra airflow to the cold air return that will be concealed by this cabinet. I'm installing the fascias (false ceiling panels) in the upper cabinets. They provide a sense of dimension and substance, and might someday house uplights or downlights if I get a hankerin' for those features. They are made of 1/4" plywood, the rear edge of which butts into the cabinet backs, which are of the same material -- too thin to dado or glue. How to solidify this joint?
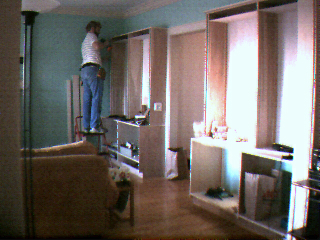
I kill two birds with one stone, by cutting plywood ribs that are glued atop the rear edge of the fascia pieces, thereby stiffening them, and providing a surface through which I can screw into the back pieces. I cinch up these screws very slowly, just pulling the facia pieces to the backs, so as not to strip the thin plywood with the screws. The result is crisp and very satisfying.
Sunday night, I quit before the nailing up the face frames -- a task that will require fresh nerves and the confidence that they bring.
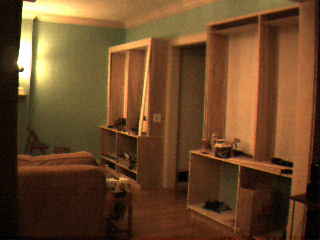
The north frames are nearly complete and the south frames are well underway. I am optimistic that excepting the moving parts (doors and drawers), I can make both cabinets paint-ready by next weekend. (This milestone has assumed increased importance to me, as like my wife, a "friend" has expressed doubt in the form of a bet against my ability to meet this schedule.) The only remaining uncertainty is the bullnose trim and molding, both of which I'll no doubt have to mill myself.
Initial week of daily activity: |
Day 1 |
2 |
3 |
4 |
5 |
6 |
7,8 |
9 |
Long-term weekend progress: |
10 |
11 |
12,13 |
14,15 |
16-18 |
19 |
Intermittent bursts of effort: |
20-22 |
23-31 |
32-35 |
Bookcase-Cam Home
Comments? e-mail me.