Bookcase-Cam - Days Twenty - Twenty Two
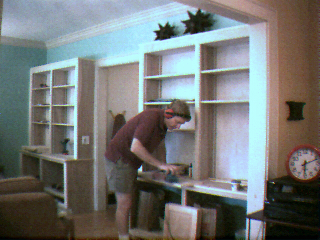
Anne is gone for a week, clearing the deck for great progress on the project. Somehow I manage to spend most of this time watching TV, but I also get a bit of work now and again. Here I cut biscuit slots to attach the bullnose trim to the lower cabinet tops:
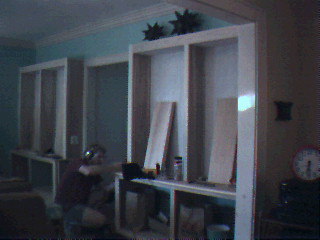
This trim had to be made up by a millwork shop because it's an odd thickness and radius, and I don't have anything that can fashion either attribute. This should be aligned precisely with the plywood cabinet top so the two pieces will appear as one after painting. I don't quite get it that close (more tuning of the biscuit cutter is needed, I think) but with judicious sanding it should be acceptable.
In this shot, two plywood shelves are having strips of birch veneer glued to their edges, so the plywood laminations won't be visible:
Compressed between the shelves is a piece of foam rubber (sold as insulation for window air conditioners), because the shelf edges are just ever so concave; if I simply clamped the shelves edge-to-edge, there wouldn't be sufficient pressure in the center to press the veneer to the plywood (the two shelves would also probably end up glued together!). Three shelves were edged this way; for the rest I used pre-glued, iron-on veneer, which I was a bit nervous about -- not having used it before -- but eventually found to be much easier, faster, and better-bonded at the ends. I'll use it exclusively in the future.
Before the shelves can be painted, the veneer edging must be trimmed; it comes a little wider than the plywood to accommodate variations in the wood -- not to mention the skill of the craftsman! I do this by very carefully belt-sanding almost to the plywood-veneer corner, then palm-sanding the remainder flush. I have come to be quite fond of this little Makita palm sander, a housewarming gift. Only recently have I realized that it can take off quite a bit of material if loaded with coarse paper. Previous to this project I never tried that, assuming that palm sanders were good for final smoothing only.
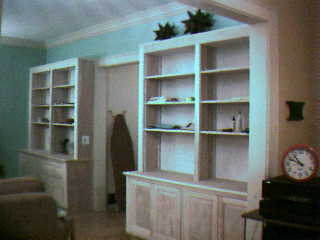
A narrow molding can also be seen at the top of the cases; it is a copy of the trim common to all the other doors & windows of the house and was made with a custom knife at the same millwork shop that made the bullnose trim (I did make the scotia under the bullnose myself, though -- yay...). The knife had a mistake in it, and to their credit the shop tweaked it and re-ran the molding for free. Unfortunately in the tweaking they introduced a flaw, which I was able to sand out, but which will need to be fixed before making any trim for future projects. Such projects, plus the fact that the new molding is coped directly into some of the original trim that it copies, are the reasons I was able to justify to myself the expense of the custom knife.
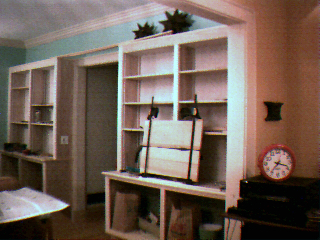
Here are the cabinet doors and drawer fronts -- not attached, just temporarily balanced and masking-taped in place -- and for the first time you can see pretty much how the finished product will look, sans paint and books:
Whoa, Lars, you are saying, where did the doors come from? (Or perhaps you are saying, whence came the doors? I will recognize either form of inquiry.) Well, I ended up having these pieces made by a shop that does only that. My alternative was to make them myself, but I'd have to buy a 1/2"-shaft router and router table, in addition to some expensive, specialized bits that I might not use again. That would have come out not too much more than the cost of having the door shop make them. But my experience making the scotia molding, plus reading an article about making this kind of door (cope and stick with raised-field panel) on a router table convinced me to simplify my life and let the specialized shop do it. Since I had originally envisioned making the whole thing myself (with Pop's help of course), I'm a bit disappointed, but I think it was the right decision given how far past the original deadline for completion I have gone. Things that should be on these shelves are piling up all around the house...
Initial week of daily activity: |
Day 1 |
2 |
3 |
4 |
5 |
6 |
7,8 |
9 |
Long-term weekend progress: |
10 |
11 |
12,13 |
14,15 |
16-18 |
19 |
Intermittent bursts of effort: |
20-22 |
23-31 |
32-35 |
Bookcase-Cam Home
Comments? e-mail me.